Thursday, May 31, 2012

Getting More Views and Traffic

If you want your post to be indexed by search engines such as Google and Bing, you should set your blog privacy settings to make your blog visible to all search engines. The internet is full of theories as to how you can raise your post’s visibility in search rankings: none will contest that good quality original content with a few well-chosen tags is the best way to get started.

The Privacy Settings control who can and cannot view your blog. You can change your Privacy Settings via your Settings -> Privacy page:


Here, you will see three Site Visibility options:

  • Allow search engines to index this site. – This is the setting used by most blogs. It allows everyone to read your blog and enables your blog to be included in search engine results and other content sites.
  • Ask search engines not to index this site. – If you want all human visitors to be able to read your blog, but want to block web crawlers for search engines, this is the setting for you.
  • I would like my blog to be visible only to users I choose – Select this option to create a private blog. If you want others to be able to view your private blog (and add comments, if you’ve enabled them) you’ll need to invite them to be a viewer.
Tell people in your social networks about your new post

You can do this using WordPress.com’s Publicize feature, which will automatically tell your Twitter followers and Facebook friends as soon as you publish a new post.


If you don’t already have a Facebook account, sign up for one.

To connect your blog to your Facebook account, go to Settings > Sharing in your site Dashboard..
Save your setting, now your blog is connected with your facebook account. Add more service like : Twitter, Yahoo, Linkedin, etc for more traffic.

    Posted by: Denmas Tugino
    Godheg Updated at: Thursday, May 31, 2012

    Wednesday, May 30, 2012

    How to Create a Facebook Group

    Have things you only want to share with a small group of people? Just create a group, add friends, and start sharing. Once you have your group, you can post updates, poll the group, chat with everyone at once, and more. Groups let you share things with the people who will care about them most. By creating a group for each of the important parts of your life — family, teammates, coworkers — you decide who sees what you share.


    How to create Facebookgroup ?
    • Go to Facebook Groups  or go to your your home page and click Create Group in the left hand column. If you have existing groups, you may need to click More before you see this link.
    • A pop-up box will appear, where you will be able to add a group name (1), add members (2) and select the privacy setting for your group(3). Click the Create Group button when you're finished. 
    • Once the group is created, you will be taken to the group's page. To get started click  at the top right of the page and select Edit Group. From here you can add a group description, set a group email address, add a group picture and manage members.
    Control who sees your group
    Secret: Only members see the group, who's in it, and what members post.
    Closed: Anyone can see the group and who's in it. Only members see posts.
    Open (public): Anyone can see the group, who's in it, and what members post.

    How to add new members to a group

    1. Go to the group
    2. Click the + Add Friends to Group field in the right column
    3.  Add your friends' names in the typehead ( you can add friend from 
         "suggested member" box)


    For all types of groups (open, closed and secret), group members can add their friends. Other people can request to join an open or closed group and be confirmed by a group admin. 


    For groups within school groups, group members can add anyone who is a confirmed member of the school group. 

    Posted by: Denmas Tugino
    Godheg Updated at: Wednesday, May 30, 2012

    Sunday, May 27, 2012

    How to Create a Google Custom Search

    Google custom search engine very useful widget if you set it up on the blog that we manage, because in addition to more relevant and easy to use, google custom search engine can be set to track the keywords that exist only on your blog / website. How to Create a Google Custom Search ?

    To create a Google Custom Search, follow these steps:
    Log in using Google Account. If you do not have a Google Account, may have to register first.
    Go to the Google Custom Search Engine with the address www.google.com/cse.
    Click the Create a Custom Search Engine or Create Custom Search Engine in the upper right corner.
    Set the search engine configuration to be created by filling in the columns provided. Start the name (I write here: mastugino.com), description (I wrote: Sharing Information, Science and Collectibles Blog Tutorial), language (I chose English), sites to search (can be a single site or multiple sites at once. Here I just fill a blog url that is http://www.mastugino.com/), select the edition (free or paid, I choose free), and do not forget to tick the service agreement. And then click next.
    Will open a new page :
    1.  You can choose the style and look, there are seven styles. Click on that you like 
         (I chose "bubblegum") and will be displayed in the preview below.
    2.  Click "next" at the bottom


    Copy the code in the box, and put in your blog : Go to your dashboard >>layout >>add a gadget >> html/javascript gadget >>paste the code and save the widget. Your search widget will appear in the sidebar like this :

    Posted by: Denmas Tugino
    Godheg Updated at: Sunday, May 27, 2012

    How to Use Twitter With Facebook

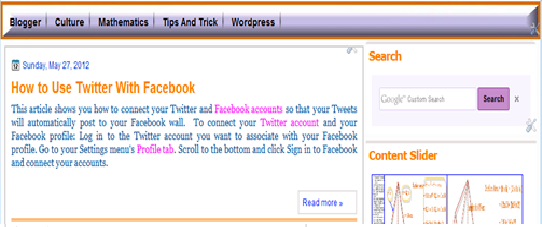
    This article shows you how to connect your Twitter and Facebook accounts so that your Tweets will automatically post to your Facebook wall.  To connect your Twitter account and your Facebook profile: Log in to the Twitter account you want to associate with your Facebook profile. Go to your Settings menu's Profile tab. Scroll to the bottom and click Sign in to Facebook and connect your accounts. 


    When prompted, select the privacy settings for who will see your Tweets posted to your Facebook wall. It is set to public by default. 
    Click Log in with Facebook and enter your Facebook login credentials, as shown below. 
    Click Allow to accept permissions.

    Your Tweets will now post to your profile Facebook wall and your username will be displayed there as well. Retweets and @replies will not be posted.  

    Privacy note: To control who sees your Tweets and username, go to your Facebook Application settings and click Edit for the Twitter app to restrict who can see your Tweets on your Facebook wall.
    If you successfully connect twitter account to your facebook account, your tweets are right on your facebook timeline automatically, as shown below:


    To connect your Twitter account to a Facebook Page:
    If you have a Facebook Fan Page, or are the admin of one, you can post Tweets from your Twitter account to your Facebook Page. Follow the steps below to connect to your Facebook profile. In your Twitter profile settings page, Select the page you'd like to connect with (shown below).


    When prompted, click to allow permission to post to the selected Facebook Page.

    Posted by: Denmas Tugino
    Godheg Updated at: Sunday, May 27, 2012

    How to Make an External Link in Blogger

    Link is a way of linking the address of the site with other sites to link your website address in the text or images. The text actually contains a link if the destination site address. If the text is plain text only, then it is not a link. Internal link means a link that leads to the url address in the same blog or easy terms could be called a link that leads to another post within the same web site. External links are links that point to other people's web/blogs, so what's the difference with the internal link external link is the purpose of installation of the link.
    How to Make an Internal Link in Blogger ?
    1.  Highlight the text you'd like to turn into a link. If you do not select any text before using 
         the link button, your link will be created but without anything to click on.
    2.  Click the Link button (or hit control+shift+a on your keyboard):

    3.  A pop-up window will appear prompting you for a URL you'd like to link to. 
         Type the URL in the text box.
    Check "Open link in new window"(if you want the link open in new window), and then press OK.

    Posted by: Denmas Tugino
    Godheg Updated at: Sunday, May 27, 2012

    How to Copy a Post in Wordpress Blog

    How to Copy a Post in Wordpress BlogIt takes much work to get a post just right. Why not reuse that effort? Copy A Post lets you duplicate a post, including the title, contents, tags and categories, so you can start a new post without having to re-enter tags, categories and formatting. Copy a Post appears within the Writing Helper module below the Editor on the Add a Post screen. To use Copy A Post, click on the button and it will open right in place.


    How to copy a post ?
    1. Go to your dashboard >> post >> copy a post;
    2. Select one of your post that want to copy.


    If you already have a post in progress and want to keep it, make sure to save the post before hitting Copy. After hitting copy  the post will look like this :
    Set the post title, categories, tags and other properties as you wish, and then publish the post.

    Posted by: Denmas Tugino
    Godheg Updated at: Sunday, May 27, 2012

    How to Add "Follow Twitter" Button on your Blog

    In addition to search engines, social networks can bring traffic to our blog. For owners of a personal blog might be traffic from social networking and forum is the right solution when traffic search engines can not detect. How does that get traffic from social networking? In fact many ways and many others explain how to get traffic from social networking, one of them by adding the Follow Twitter button on the blog (Note: you must already have a twitter account). Well this time I will give way to add the twitter button to follow your blog


    a. Go to Twitter Resources;
    b. Select "Twitter Button"

    1)  Click "follow button"
    2)  Check "Show Username"
    3)  Coppy the code.

    Next step :
    Go to your blog dashboard >> add gadget>>html/javascript gadget>>paste the code>>save widget.

    Posted by: Denmas Tugino
    Godheg Updated at: Sunday, May 27, 2012

    Saturday, May 26, 2012

    How to Set the Widget on The Blog Header

    Many bloggers are having trouble how to put widget in header of blogger blog, That's because the header area on the blog on blogger is locked! so we can not add a widget in this area. So in this area are only allowed to change the name and description. Which is  sometimes we want to add a new component in this area, especially for bloggers who put up advertisements. In order for this header area can be modified and added other components besides the title and description do the steps below:

    For the first step you Login to Blogger, after entering the dashboard menu click template >> backup your template(optional)>>edit html>>check expand template widget, find the code below (use ctrl+f) :

    <div id='header-wrapper'> 
    <b:section class='header' id='header' maxwidgets='1' showaddelement='no'>
    <b:widget id='Header1' locked='true' title='Header' type='Header'>


    Maybe each template using different codes. The point is that the code look like the code in your blogspot template. Well now see the code. There are variables that you can change, with the aim that this area can be modified, the variables include: 
    1.  maxwidgets = '1', change the value of this variable by you, eg the value filled 
         in two, means the maximum component that can be placed in this area 
         is the two component;
    2.  Showaddelement = 'no', the default value of this variable is' no ', change it to' yes'. 
         Its mean that you can add an element;
    3.  Locked = 'true', the default value of this variable is' true ', change it to' false'. 
         It's mean that the widget is not locked;


    <div id='header-wrapper'> 
    <b:section class='header' id='header' maxwidgets='2' showaddelement='yes'>
    <b:widget id='Header1' locked='false' title='Header' type='Header'>

    4.  Save Template. and see the results on the window layout !


    You can add widget in the header area : add gadget>>html/javascript widget, put the code and save widget.

    Posted by: Denmas Tugino
    Godheg Updated at: Saturday, May 26, 2012

    Friday, May 25, 2012

    Add Meta Description Tags to Blog

    Meta Tags are HTML elements used to provide structured metadata about a web page. Such tags are placed in the head section of an HTML document and Search Engines might use this data to display the search snippet when they display a page from your blog. Most of the Social Sharing Tools like the Facebook Share or the Google Plus buttons will pick up this meta description to create the snippet which gets shared to the Social Networks.


    How to add Meta Description Tags
    Go to your blog dashboard >> setting>>advanced search >>enable meta tag. In the Text area give a 150 character description which will describe your Blog. This text might be used by Search engines when your Blog’s home page is displayed on Search Engines. Here is the snippet that I have given"Sharing Information, Science and Collectibles Blog Tutorial"


    Save your setting.

    Now when you make a Post, you can set the Meta Description from the Post Editor’s Post Settings  Sidebar.

    You can always edit the Search Description for existing posts as well

    If you are having a custom template, make sure that the following line of code is present in your template. To do that go to Template and Proceed to Edit HTML . Find

    <b:include data='blog' name='all-head-content'/>

    If it's not present, add it just before </head>
    That's It you have done it.

    Posted by: Denmas Tugino
    Godheg Updated at: Friday, May 25, 2012

    Monday, May 21, 2012

    How To Make Facebook and Twitter Share Button in Blogger

    Making share on facebook, twitter, digg button, or maybe coupled with Google + above each post / article blog by adding code or scripts on your template. Share button in your blog can actually get the code directly on the site that provide this code. The site, such as examples of sites that provide the code for sharethis.com in pairs on your blog with a full share feature. However, the less attractive is placing less strategic.

    1. Login to your blogger account.
    2. Click the Design tab -> Edit HTML.
    3. Download the template used in case of errors can be returned to normal.
    4. Press Ctrl + F to facilitate the search.
    5. Search <div class='post-body entry-content'> or class = 'post-body entry-content' 
         and usually there are 2 code, use the first code
    6. If you have found, copy the code below and paste it right above 
        <div class='post-body entry-content'>
    <b:if cond='data:blog.pageType == &quot;item&quot;'><div style='border-top:1px solid #ccc;border-bottom:1px solid #ccc; padding:8px 0px;margin:5px 0px 5px 0px;width:100%;float:left;height:20px;'><div style='float:left;padding-left:0px;font:normal 12px Georgia;'>Share on :</div><div style='float:left;padding-left:10px;'><a name='fb_share' type='button_count'/><script src='http://static.ak.fbcdn.net/connect.php/js/FB.Share' type='text/javascript'></script></div><div style='float:left;padding-left:10px;'><a class='DiggThisButton DiggCompact'/><script type='text/javascript'>(function() {var s = document.createElement(&#39;SCRIPT&#39;), s1 = document.getElementsByTagName(&#39;SCRIPT&#39;)[0];s.type = &#39;text/javascript&#39;;s.async = true;s.src = &#39;http://widgets.digg.com/buttons.js&#39;;s1.parentNode.insertBefore(s, s1);})();</script></div><div style='float:left;padding-left:10px;'><a class='twitter-share-button' data-count='horizontal' data-via='User Name' href='http://twitter.com/share'>Tweet</a><script src='http://platform.twitter.com/widgets.js' type='text/javascript'/></div><div style='float:left;padding-left:10px;'><!-- Place this tag where you want the +1 button to render --><g:plusone size="medium"></g:plusone><!-- Place this render call where appropriate --><script type="text/javascript">  (function() {    var po = document.createElement('script'); po.type = 'text/javascript'; po.async = true;    po.src = 'https://apis.google.com/js/plusone.js';    var s = document.getElementsByTagName('script')[0]; s.parentNode.insertBefore(po, s);  })();</script></div></div></b:if>
    Look at the picture below :
    7. Click Save Template
    That How To Make Share Facebook, Twitter, Google and Digg + On Blogspot, please leave your comment,  good luck! 

    Posted by: Denmas Tugino
    Godheg Updated at: Monday, May 21, 2012

    Thursday, May 17, 2012

    Volume and Surface Area of Triangular Prism

    Volume and Surface Area of Triangular Prism. Triangular prism is an polyhedron. A prism with two identical bases. Prism is a solid object that has two identical ends and all flat sides. The cross section is the same all along its length. The shape of the ends give the prism a name, such as "triangular prism"

    Surface Area of Triangular Prism
    A = (b x h) + ( 3 x l x b )


    Volume of Triangular Prism

    Posted by: Denmas Tugino
    Godheg Updated at: Thursday, May 17, 2012

    Volume and Surface Area of Cone

    Volume and Surface Area of Cone. Cone is a solid shape with an elliptical base and curved surface that tapers to a point (vertex). Vertex is where : two or more rays or the arms of an angle meet, the adjacent sides of a polygon meet or the edges of a solid figure meet. A cone has a flat base, It has one curved side, Because it has a curved surface it is not a polyhedron.


    Surface Area
    Surface Area of Base = Ï€ × r2, Surface Area of Side = Ï€ × r × s
    Surface area of Cone = Ï€ × r2  + Ï€ × r × s


    Volume = 


    Posted by: Denmas Tugino
    Godheg Updated at: Thursday, May 17, 2012

    Volume and Surface Area of Rectangular Cuboid

    Volume and Surface Area of Rectangular Cuboid. In a rectangular cuboid (a polyhedron, a right prism with six rectangular plane faces ), all angles are right angles (a right angle is an internal angle which is equal to 90°), and opposite faces of a cuboid are equal ( having the same amount and value). It is also a right rectangular prism (a polyhedron, a prism with two identical, rectangular bases).  


    Volume and Surface Area
    The volume of a rectangular cuboid is found using the formula:
    Volume = Height × Width × Length
    Which is usually shortened to:
    V = h × w × l
    Or more simply:
    V = hwl


    Surface Area
    And the surface area is found using the formula:
    A = 2(wl + lh + hw)
        = 2((15x20)+(20x10)+(10x15)
        = 2(300 + 200 + 150)
        = 2(650)
        = 1.300 cm

    Posted by: Denmas Tugino
    Godheg Updated at: Thursday, May 17, 2012

    Volume and Surface Area Of Cube

    In geometry, a cube is a three-dimensional solid object bounded by six square faces, facets or sides, with three meeting at each vertex. The cube can also be called a regular hexahedron and is one of the five Platonic solids. It is a special kind of square prism, of rectangular parallelepiped and of trigonal trapezohedron. The cube is dual to the octahedron. It has cubical symmetry (also called octahedral symmetry). It is special by being a cuboid and a rhombohedron.


    A cube is a solid shape that has :

    • 6 square faces all equal in size.
    • 8 vertices ( corners) and
    • 12 equal edges
    Surface Area of Cube :
    6bor 6 x b2
    Volume of the cube
    Volume= b3  or b x b x b
                  = 10 x 10 x 10
                  = 100 x 10
                  = 1.000 cm3

    Example
    A cube has 12 cm ribs. Calculate the surface area and volume of ​​a cube !
    Surface area = 6b
                           = 6 x 12 x 12
                           = 72 x 12
                           = 864 cm
    Volume = b x b x b
                  = 12 x 12 x 12
                  = 144 x 12
                  = 1.728 cm

    Posted by: Denmas Tugino
    Godheg Updated at: Thursday, May 17, 2012

    How to Send an E Mail

    How to Send Email Yahoo - Have you read about on the yahoo list of previous posts on this blog? In the post it was discussed about how to create an email account at yahoo. Well if you already have an email in yahoo, now the question is how do I send this email yahoo? That is the subject of our discussion in this article.


    Login to YahooMail.com or click on Yahoo.com and click on the mail menu. Enter your  username and password login. 

    As stated in the figure below:Click New in the upper left corner to write an email.


    On the new page, click in the blank box beside
    1.  To: and type the email address of the person you're writing to.
    2.  Add addresses in the Cc: field if you want to send a copy of your email to anyone else.
         Others receiving this email will be able to see anyone listed in the Cc: line.
    3.  Inside Subject:, give your email a title—then write whatever you want to in the message
         window. That's the big box below.
    3.  Sending is the easy part. Once you're done writing (and attaching photos or files if you
         want... see below), just click Send.

    Attach Photos and Files:
    Click Attach at the top of the page. In the window that opens, click Browse to find and select the file you want. When you've got it, click Open. Repeat these steps to attach more files, and when you're finished, click Attach Files.

    Posted by: Denmas Tugino
    Godheg Updated at: Thursday, May 17, 2012

    How to Set up a Yahoo! Mail Account

    Yahoo! Inc. (NASDAQ: YHOO) is an American multinational internet corporation headquartered in Sunnyvale, California, United States. The company is perhaps best known for its web portal, search engine (Yahoo! Search), Yahoo! Directory, Yahoo! Mail, Yahoo! News, Yahoo! Groups, Yahoo! Answers, advertising, online mapping, video sharing, fantasy sports and social media website and services. It is one of the largest websites in the United States.

    How to Set up a Yahoo! Mail Account ? Follow this tutorial step by step :
    A.  Visit the Yahoo! Mail home page to take the first step to creating your own email
          account at Yahoo.
    B.  Click on the 'Sign Up' link that appears somewhere near the top of the Yahoo home
          page.
          1) Name : fill with your name
          2) Gender : male/female
          3)  Birthday : month-date-year
          4) Country : fill with your country
          5) Languange : fill with your languange 
          6) Yahoo ID : fill with your ID 
          7) Password : fill with your password
          8) Re-type password : re-type your password
          9) Alternate Email : fill with your another email, or leave it blank. This email is used to 
               send confirmation if you forget your ID or password.
        10) Secret question 1 : select one question and the answer that easy to remember
         11) Secret question 2 : select one question and the answer that easy to remember
         12) Visual code : type the code shown
         13) Create my acount.

    Fill the form step by step and then click "Create My Account. Once you have successfully created your account will appear like this
    Click "Continue" and go to Yahoo home page.

    Posted by: Denmas Tugino
    Godheg Updated at: Thursday, May 17, 2012

    Wednesday, May 16, 2012

    How to Start a Blog

    A blog (a portmanteau of the term web log) is a personal journal published on the World Wide Web consisting of discrete entries ("posts") typically displayed in reverse chronological order so the most recent post appears first. Blogs are usually the work of a single individual, occasionally of a small group, and often are themed on a single subject. Blog can also be used as a verb, meaning to maintain or add content to a blog.


    How to Start a Blog in Blogger ?
    A. Sign Up to Create a Blog at Blogger.com
    1) Your e-mail, 2) Re-type your e-mail, 3) Your Password, 4) Re-type your password, 5) Your Profile name, 6) Your sex, 7) Your Birthdate, 8) Word verification, 9) Check I agree Term and Condition, 10) Next


    B. Sign In with Your Google Account
    1) Your e-mail, 2) Your password, 3) Sign in


    C. Name Your New Blog
    1) Your Blog Name, 2) Your Blog Addres, 3) Your Blog Theme, 4) Create Blog


    D. Write Your First Post
    1) Post Title, 2) Publish Post, 3) Save a draft, 4) Preview Post, 5) Close Post, 6) Label of Your Post, 7) Post Entry.


    That's all there is to it! You're now ready to write your first blog post in your new  Blogger.com blog and join the blogosphere.

    Posted by: Denmas Tugino
    Godheg Updated at: Wednesday, May 16, 2012

    How To Add a Twitter Widget To Your Blog

    How To Add a Twitter Widget To Your Blog. The first step you must create a Twitter Account. Access widgets from the Resources link in the footer of all Twitter web pages. Simply choose the one that matches where you would like to include it. To add a Twitter widget to your social network, website, or blog:


    How To Add a Twitter Widget To Your Blog, follow step by step of this tutorial :
    Log into Twitter.  Click Resources at the bottom of the details pane on the right hand side of your screen.
    1.  Select Widgets
    2.  Select My Website
         Select the widget that shows the Tweets you'd most like to display on your website:
    Select Profile Widget and set the widget appearance :
    1. Username : Enter your username
    2. Preferences : Set the scroll bar, tweets load, and number of tweets.
    3. Apperarance : Set the Widget color, shell color, shell text, tweet background, tweet 
        text, and link color.
    4. Dimension : Set the dimension of widget that appropriate with your sidebar ( if it place
        in sidebar)
    5. Click finis and grab the code.

    If you are using Blogger just click "add to blogger" and follow the instruction to add widget in blogger. Done, your Twitter widget now appear in your blog.

    Posted by: Denmas Tugino
    Godheg Updated at: Wednesday, May 16, 2012